Ozarondack Chairs
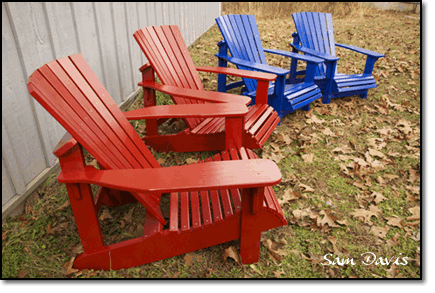
So, how about taking the classic Adirondack style outdoor chair and redesigning it with fortified joinery and a more nature-resistant finish to create an heirloom quality piece of furniture?
This iconic chair evokes relaxing afternoons by the lake or on the porch, with a cool beverage on a blue sky summer day. The canoe paddle arms call out for a plate of food, while the low seat and reclining angle are the siren song of daydreaming or spinning tall tales (for those who have not succumbed to some serious napping.)
A friend kicked off the design process with a pile of pine lumber sawn off the family farm and a desire to create some legacy furniture for his sons and grandchildren. I have always valued research and study, from back to my time as a science teacher. Studying numerous chair designs and plans was a logical beginning to this project.
What I learned was that there were many variations on the general design themes of this chair: broad arms and low angles. This type of furniture has mostly fit into the DIY tradition: weekend warriors with a driveway, sawhorses, a skillsaw, a jigsaw, a power drill, and a bunch of screws could build one of these on a weekend...sit back on Sunday afternoon with a beer and enjoy their creation. It is the everyman relaxing chair with the utility and simplicity that most anyone could build... and plenty of free plans available. There's no telling how many folks took on the task of building an Adirondack chair as their first major project, and then went onto other woodworking endeavors or just reached for the second beer on that Sunday.
My first experience with this type of chair was at a boy scout camp on the porch of the main building...there was always some pushin' and shovin' (which I think was part of the oath, "On my honor I will do my best to do my duty to God and my country and to obey the Scout Law; to help other people at all times; to keep myself physically strong, mentally awake, and morally straight, and do whatever it takes to grab the best seat on the porch.")
Building furniture is like teaching, it can be accomplished by any number of methods, just as a lesson can be taught at any level to a wide range of learners. Fundamentally it's all about adapting to one's own level of knowledge and skill: making choices based on your objectives, tools, time, materials, and design.
The goal of this project was to properly honor what was once a beautiful pine tree on the family farm, and fashion it into something important: heirloom quality chairs for the family to sit upon. Someone once said, "If you name it, you claim it." So, the birth of the Ozarondack chair was witnessed.
Above all else, a chair must be comfortable. The proper design of the seat, back, and arms: their shape, angle, length and how they feel against your body is the essence of a happy sitting experience. It is something elemental, some kind of chair DNA. You may or may not be conscious of it if a chair feels just right, but you will surely be alerted if you are uncomfortable or if the chair does not suit the task (eating, reading, resting, working, visiting, etc.)
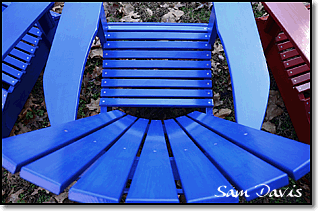
The front of the seat is low, 13.5" off the ground (a few inches below typical chair seat height) on an 18 degree angle above horizontal. The back is at a 15 degree tilt from the seat, a reclining angle for a relaxing task. The seat has a rolling shape for you to stretch out your lower legs and conform to your thighs and bottom. The seat slats are 1.5" wide, narrow to accommodate the roll and eased on the edges for comfort. The back slats are tapered to fan out with a narrower radius arc at the bottom and larger radius at the top to better conform to the curvature of your back and the widening of the human body at the shoulders. The arms are wide in front, 7.5" for that plate of food, and a 2" radius "canoe paddle" curve to wrap your hand over.
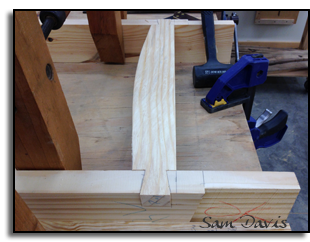
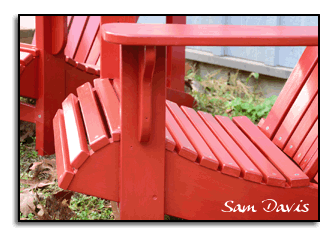
The joinery of the Ozarondack chair is the key to achieving a long life. Identifying the parts of the chair that will be under the most stress and matching them with the proper joint is critical. I noticed from sitting on this style of chair in the past that racking across the width of the chair had to be addressed. The typical butt-jointed end grain stretcher screwed between the legs was replaced with a dovetail (photo right) on both front and rear legs. Where the legs connect to the seat supports on both sides, tight half-lap joints were added to both strengthen these intersections and mitigate front-to-back racking.
The joint which connects the arm to the front leg demands more than the usual "screw it together" approach. Getting in and out of the chair requires you to either push down with some body weight on the end of the wide arm or pull back and up on it. To resist forces in both directions, a through-mortise with wedged tenon and an outside arm bracket, seemed good choices. The bracket is blind-dadoed into the leg and the underside of the arm, providing a solid "joint-glue-screw" combination. The same technique was used where the back end of the arm connects to the rear leg. The photo (left) shows the top of the front leg with it's tenon and shoulder. A pair of small notches on the tenon, which terminate at pre-drilled holes just above the shoulder, are for two oak wedges to spread the tenon and lock it into the arm mortise. The dado extending down the outside face of the leg houses the arm bracket. After the glue has dried, the photo (right) shows the excess length (1/8") of the wedged tenon being cut-off flush to the arm surface with a Japanese saw. A waterproof glue and auger-bit type stainless steel screws were used on all joinery when the seat/leg assemblies were clamped-up.
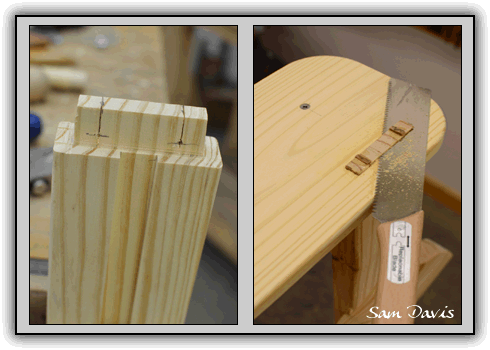 |
| Wedged mortise and tenon joint at arm/front leg intersection. |
The protective finish on the chairs must not only defend against the destructive forces of moisture and sunlight, but cover the vagaries of the pine itself: knots, imperfections, and blue stain. The blue discoloration sometimes seen in pine lumber is caused by a certain dark-colored microscopic fungi in the sapwood of the tree. 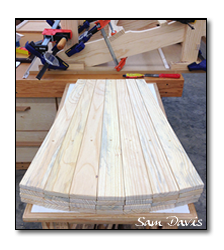 While it may be desirable in some applications, the choice here was to have a bright colorful paint make a design statement, not the fungi. In order to prepare the pine for paint and prevent any knots or pitch from bleeding through the final finish, two coats of a shellac-based primer/sealer (Bullseye B-I-N) was brushed on first. Three coats of a semi-gloss exterior milk paint, topped off with three coats of an exterior water-based, UV and mildew-resistant urethane completed the finish. While it was more labor intensive, all of the chair parts and leg/set/arm sub-assemblies were pre-finished before final assembly to give these chairs the best shot at a long happy life.
