

The Stuart Bench
Another legacy furniture opportunity came along in 2018: a pair of live-edge walnut benches for some friends. The lumber was harvested from walnut trees adjacent to their family homestead, Stonehedge Farm, outside of Louisburg, Kansas.
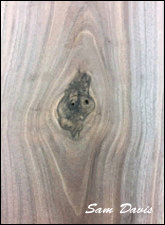
The final pieces are a memory gift of the old farm for each of their daughters. The trees that once provided shade, shelter, and nuts, were companions to the farmhouse for decades. Now they reveal their inner selves in the swirling purple and dark tones of the walnut grain and the heiroglyphics of the larva pathways in the cambium layer. The edge of the tree is now the edge of the bench.
The reverence for this wood called out for the interlocking strength of hand-cut traditional joinery. Careful attention was paid to reconstructing the slices of walnut in such a way that they were reunited in the bench next to or near their mates from the tree. The tusk tenons evoke the take-apart, travel, and reassemble characteristics of everyday furniture of the 1600's: the spirit of handmade things and people in motion. The staked leg tenons, mortise and tenon joinery, and the live edge speak the language of wood fibers intertwined with the community of insects dwellng under the tree bark.
The original design proceeded through the stages of conversation, observation, research, sketch, and finally into scaled drawings. My new grandson was born during this phase and the idea was hatched to build a small model as a practice project for the benches. I built a small 7" tall step-up stool when I was in woodworking school some 40-odd years ago.
 It helped both of my daughters to reach higher in their early lives. So I redesigned that stool, a "glue-screw-n-plug" piece, with most of the joinery that was planned for the benches: a practical model. It was interesting to reflect on how my skills and approach to woodworking evolved over the generations. History, you might say. Nothing quite like stretching out the eyes, hands, muscle memory and tools in a warmup before the main events.
Brief description of project
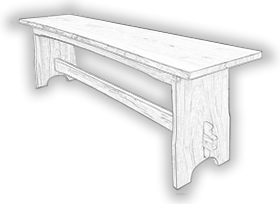
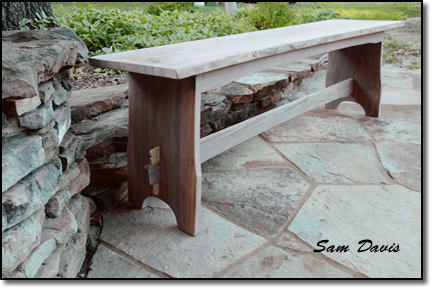
The benches are destined for use as either a hallway shoe-changing seat, or as seating for two at a kitchen table. The design includes eight main parts: a seat supported by a pair of aprons, a pair of slab legs with a stretcher between and tusks to hold them tight, some wedges to pin the legs to the seat and wooden trenails to lock the aprons and tusk.
It is an expression of the simplest early chair form, an "H", with no back or arms; combined with the strength, beauty, and complexity of the joinery. Final dimensions at the seat are 54" L x 17" H x 13" W with legs at 7 degree angles. The seat and stretcher are 7/8" thick stock, while the aprons and legs are 3/4".
Construction
Seat
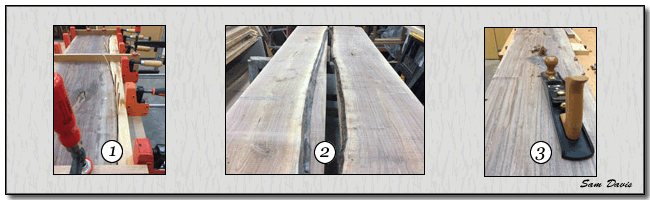 |
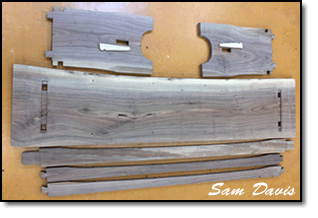
The real work began with selecting boards for seat stock with a good live edge, an attractive grain, and sufficient width and length for matching legs to be cut out for each bench (#2 above). Neither board was thick enough to be jointed flat and planed true right out of the pile and still end up with 7/8" thick stock.
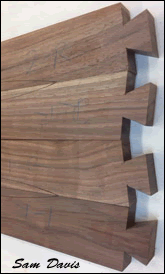
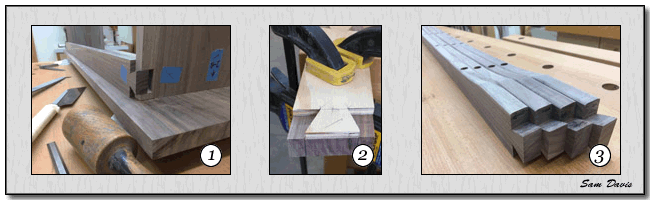
The solution for this initial challenge was to rip each board with a thin blade on the table saw, joint and plane faces separately and then reconstruct them into a "slice of the tree." Of course that required a clamping caul that matched the contour of the live edge for glue up. I scribed a pine scrap, bandsaw cut, and rasped the edge, creating a secure clamping line for each seat (#1). Each long glue joint was reinforced with plate biscuits. A low-angled smoothing plane and hand scraper leveled the glue line and the final grain appearance of a single board seat (#3).
Joinery: Legs and Seat
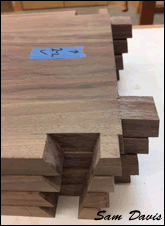
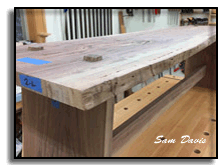
Since each of the joints are individually fit together, consistent labeling of parts, their orientation and position are critical for optimum artistic matching of wood grain and error reduction. Much of the joinery work is accomplished with the bench upside down, and constantly being flipped around. Blue painter's tape and a sharpie to the rescue!
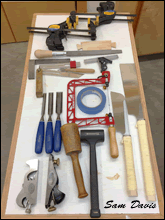
The joinery was put together and taken apart many times, so fitting parts with the proper degree of tightness was critical. The Goldilocks principle applied: not too loose, nor too tight...the temperature of the porridge needs to be just right. I have found that an 8 oz. dead blow rubber mallet to knock things together works quite well. It provided just enough force so that I could lightly drive parts together and wiggle them apart repeatedly without splitting any pieces.
The general sequence of joinery starts at the top of each bench, with the seat and leg joints, then the stretcher and legs, followed by the seat and aprons. A healthy balance of confidence and self-doubt saved the day a few times along the path. Checking and re-checking placement and direction helped to avoid any major backward steps in this project.
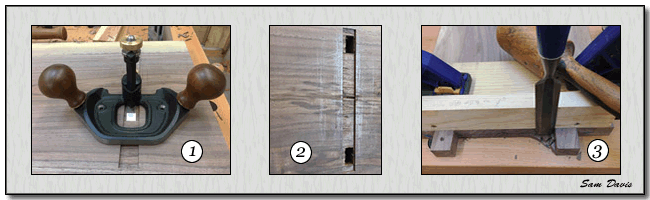 |
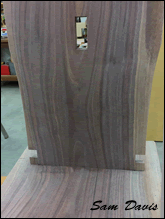
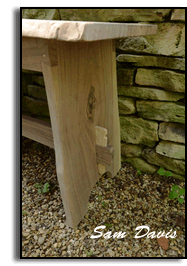
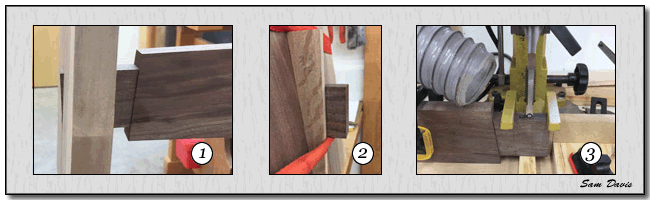
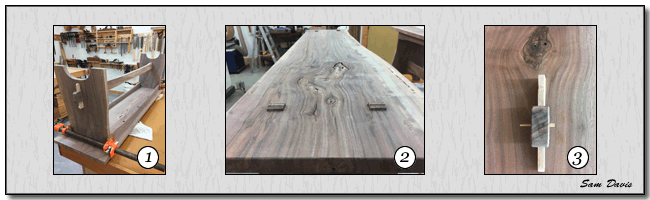
Underneath the seat, a housed dado holds the inset profile of the top of each leg. This serves to flatten any small cupping in the lumber and to hold the leg in position for working that joint. It was knife-scribed, chiseled, and then leveled out to a depth of 1/8" with a router plane (#1 above). Mortises for the staked legs were roughed out on the mortising machine, then cleaned up with a sharp chisel and file (#2). Then the twin through-tenons (stakes) were hand cut with a Japanese pull-saw, and finished to a proper fit with a shoulder plane, paring chisel, and smooth file (#3). The use of an angled chisel guide was extremely helpful to maintain the 7 degree angles throughout the project.
Maintaining sharp edges on planes, chisels, and knives was critical to succeeding with this type of joinery. This project represented a major move along the sharpening continuum from my old ways-- sharpen it when it gets dull -- to now "maintain a sharp edge continually throughout the day." The result is easier on the hands, less force, more control, and greater efficiency. Oh, and tighter joints. What a difference!
Joinery: Legs and Stretcher
Locking in the legs to the seat atop the bench shifts attention to the joining of the lower bench. One joint determines the next and the completed fit of joints on one bench leads to work on the other bench.
First, the mortise locations in the legs for the stretcher tenon and tusk joint were layed out with a knife, roughed out on the mortiser and finished to size with mallet, chisel, and file. Whoa! Funny how when I just re-read that last sentence, the great contrast between how much time it took to do the work and the brief moment to summarize it, well... it makes me smile. 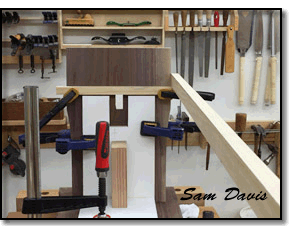 That gap is filled with reviewing the plan, orienting the wood as to which way is up and which face is out, careful measuring and marking, machinery set-ups, tool sharpenings, and many mallet blows.
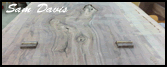
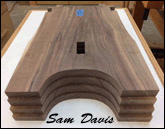
Photo (Left) shows the bench seat and leg assembly upside down on the workbench. A clamping jig holds all at the correct angle and position to determine the exact length of the stretcher. A pine 1x2 on the right will be scribed as a pattern for the 7/8" thick stretcher.
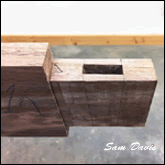
The stretcher tenon that passes through each leg was cut next, to meet the angle of the leg and to fit just so in the leg mortise (#1 below). A Japanese pull saw and a shoulder plane do most of the work. The position of the tusk in relation to the tenon and leg was scribed onto the side of the tenon and transferred around it (#2). Next, the vertical mortise to house the tusk was hogged out on the mortiser (#3) and refined to allow the 5/16" thick quarter sawn white oak tusk to wedge the leg against the shoulders of the stretcher tenon when pounded in during final assembly. Curving and dressing the bottom edge of the stretcher and ends of the tenons was done after all the joinery was completed, prior to final pre-assembly.
 |
Butterfly Keys
Small checks appeared along the grain near the ends of the seats on both benches indicating possible future end splits.
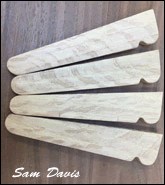
 This issue needed to be addressed by mortising in butterfly keys across the grain where necessary. As Barney Fife would say, "Nip it. Nip it in the bud." The nipping commenced with making a pattern, tracing it onto some 1/4" thick walnut stock, cutting them out on the scroll saw and shaping them to final form.
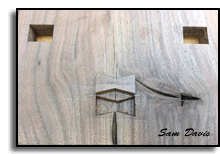
The butterflies were traced onto the seat and mortised out with a chisel to a tight fit (photo right), leaving the top face protruding slightly above the seat. After tapping in with some hide glue and clamping overnight,they were leveled flush with a sharp block plane. With the open wounds stitched, time to jump back up to the seat/leg intersection and work the aprons.
Joinery: Aprons and Legs
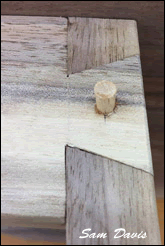
Aprons (rails) that run along under the seat serve several purposes: stiffen the seat, further solidify the leg/seat intersection, and permit the seat wood to expand and contract seasonally while not splitting the seat. A full-lap dovetail on the end of each apron locks this joint together (#1 below). The dovetail is asymmetrical due to the leg angle, so is not a true 15 degrees, but looks cool. The tail is scribed from a pattern (1/8" overlap beyond leg) onto the apron stock and sawn out first (#2 below), pared with a chisel and filed to smooth and square.
 |
There is always more than one path in a process. One advantage of having to cut the four same joints per bench is that you have plenty of opportunities to discover what works, and what doesn't. The best pathway I found was to: clamp the first tail end in position and scribe the socket onto the edge of the upper leg; remove, cut the pin and fit the tail into it. Now, with the joint on one end completed and positioned against the leg, scribe the inside length of the apron shoulder at the other end. 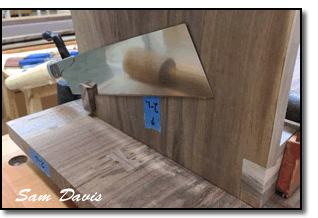 Then mark out the second dovetail (again long), prepare it and finally scribe it’s profile onto the leg and cut out the pin to match the tail.
After repeating this process on the other apron, both aprons were clamped into place and a low-set Japanese hand saw was used to cut the final length at each end using the leg surface as a saw guide (photo left). Curved bottom edges of aprons were then cut and dressed.
The direction of the wood grain along the length of the legs and seat are in the same orientation, and move these parts together with seasonal differences across the grain due to changes in humidity. Holes for washer-head screws to fasten the apron into seat bottom were drill pressed and counter sunk stepped (#3 above). The hole diameter was greater than the screw shaft within the apron, so that the seat is allowed to move independently of the apron, while still held fast by the screw head in the apron.
![]()
Final Assembly
Once a trial assembly (#1 below) and any remaining adjustments were made, wedges were prepared to drive into saw kerfs in the through-tenons of the legs at the seat. Final fitting of these tenons is
critical to leave just enough of a gap so that the 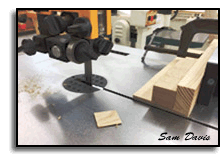 wedges (cut at a 4 degree resultant angle) will spread the tenon out to fill the space when
pounded in flush. Wedge cutting jig (right) uses quarter sawn white oak stock (made from cutting a 1" wide piece off the end of a 1" thick x 8" long board-keeps the grain direction along the length of the wedge, not across) with miter gauge set at 2 degrees. After cutting one side of the wedge, stock is rolled over and opposite face is cut to complete each wedge.
wedges (cut at a 4 degree resultant angle) will spread the tenon out to fill the space when
pounded in flush. Wedge cutting jig (right) uses quarter sawn white oak stock (made from cutting a 1" wide piece off the end of a 1" thick x 8" long board-keeps the grain direction along the length of the wedge, not across) with miter gauge set at 2 degrees. After cutting one side of the wedge, stock is rolled over and opposite face is cut to complete each wedge.
The trial dry assembly revealed a solid bench with no movement: a well-joined piece with no glue. Anyway, hide glue was used throughout the joinery. With the bench upside down, the order of assembly was much like the order of construction, except that the legs and stretcher sub-assembly were set together first, before driving leg tenons into the mortises in the bottom of the seat. Next, the tusks were pounded in to pull the shoulders of the stretcher through-tenon tight against the inside faces of the legs. The aprons were then glued and clamped into the legs. The initial assembly is completed by flipping the bench upright and inserting the oak wedges into the protruding staked legs (#2 below).
 |
Once the glue sets overnight, holes for trenails (Japanese tapered wooden nails) were drilled through the apron dovetails into the edge of the legs. The nails were glued, driven in, and the excess length was cut off later with a flush-cutting Japanese saw. The same process is used with pins through the stretcher tenons to lock in the tusk (#3 above). The top of the tenons and oak wedges in the seat were also cut flush at this time. Holes were then drilled for screwing the aprons up into the bottom of the bench.
![]()
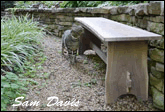
The slices of the tree that once stood by the farmhouse are now reunited to provide a place to sit. |
Stuart Bench Photo Gallery |
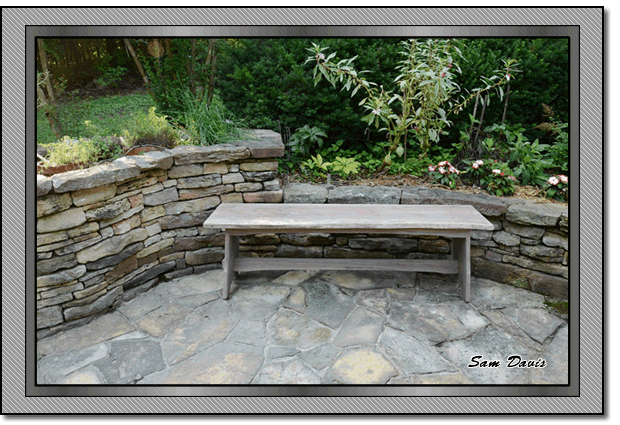
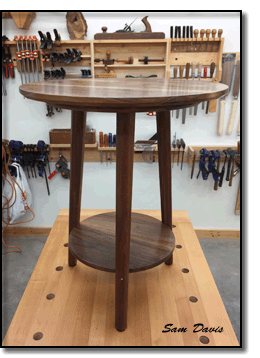 |
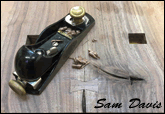
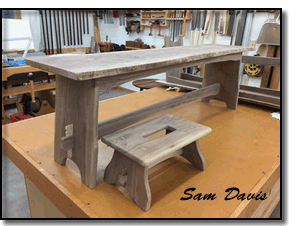
*The benches left the shop unfinished, so no photos to share here. To get an idea of what this outstanding wood looks like finished -- here's a staked table from the same stock that now resides by my chair in the house, a mid-century modern take on old school joinery. |
